Blackmagic Design DaVinci Resolve Studio
by Blackmagic DesignDaVinci Resolve Studio, from Blackmagic Design, is a renowned advanced color correction software and now also a full-fledged, non-linear editing system — it even allows to you to import projects from other NLEs, such as from Premiere Pro, as XML files.
*NOTE Your purchase will provide you with the most recent version of Resolve Studio.
- Obročno plaćanje Obročno kartično plaćanje bez kamata 2-12 rata putem Visa Classic kartica u izdanju UniCredit Bank. Ostale načine plaćanje provjerite na linku: Načini plaćanja.
- Brza dostava Za sve narudžbe unutar BiH zaprimljene do 14h dostava će biti izvršena sljedećeg radnog dana. Više detalja provjerite na linku Načini dostave.
- Kontakt Mail: info@aviteh.ba - Telefon: 033 24 67 67 - Adresa poslovnice: Malta 29, Sarajevo
Sadržaj pakovanja
- Blackmagic Design DaVinci Resolve Studio
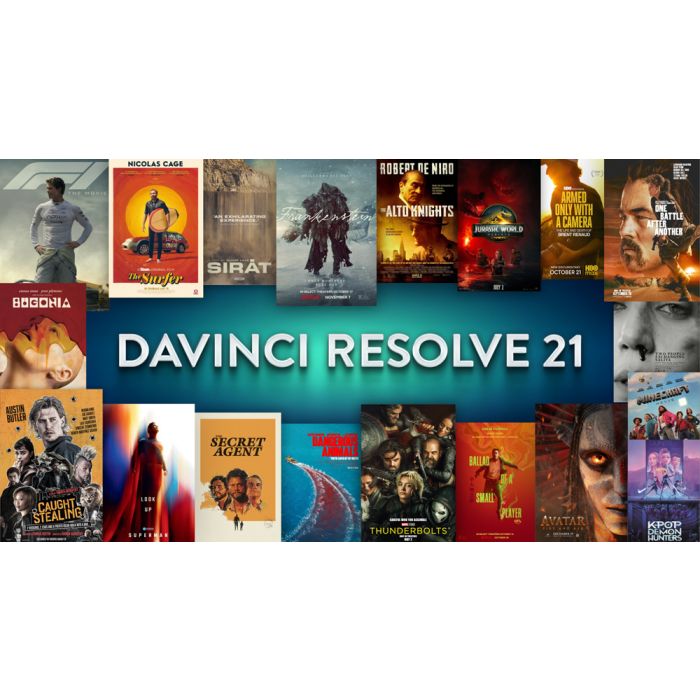
DaVinci Resolve 21
Professional Editing, Color, Effects and Audio Post!
DaVinci Resolve is the world’s only solution that combines editing, color correction, visual effects, motion graphics, audio post production and now photo editing all in one software tool! Its elegant, modern interface is fast to learn and easy for new users, yet powerful for professionals. DaVinci Resolve lets you work faster, at a higher quality, because you don’t have to learn multiple apps or switch software for different tasks. You can work with camera original quality images throughout the entire process. It’s like having your own post production studio in a single app! Best of all, by learning DaVinci Resolve, you’re learning how to use the same tools used by Hollywood professionals!
Hollywood's #1 Post Solution
High end professionals working on feature films and television shows use DaVinci Resolve more than any other solution! That’s because it’s known for incredible quality and creative tools that are light years beyond the competition. You get DaVinci’s Emmy™ award winning image technology with 32-bit float processing, patented YRGB color science and a massive wide gamut color space for the latest HDR workflows. You also get the legendary quality of Fairlight audio processing for the best sound in the industry! With DaVinci Resolve, you get the same tools professional colorists, editors, VFX artists and sound engineers use every day to finish your favorite films and streaming television shows!
What’s New in DaVinci Resolve 21
DaVinci Resolve 21 introduces the Photo page, bringing Hollywood's advanced color tools to still photos for colorists and photographers! Plus there’s over 100 new motion graphic effects, 50 new features and hundreds of quality of life improvements. New AI tools include IntelliSearch for fast content searching, CineFocus for focal point adjustment, tools for facial refinement, and more. The cut and edit pages have improved keyframing and greater graphic format support. Fusion includes the Krokodove toolset with over 70 new graphics, and Fairlight’s folder function simplifies audio track management. MultiMaster trim passes, layer list node graphs and group versions enhance color page workflow.
AI Tools
Search Content with AI IntelliSearch
Instantly search for people and content with AI IntelliSearch! Analyze media and use the IntelliSearch tool to find specific objects or key words in dialog. You can even search for individual faces! Results appear as whole clips in the Media Pool for faster clip organization and editing.
Advanced AI Speech Generator
Generate speech from written text using one of Blackmagic’s voice models or a sample of your own. The DaVinci AI Neural Engine can create a unique voice from as little as a 10 second clip! Adjust speed, pitch and even inflection, to create multiple performances for voiceovers, narration and more.
Adjust Focus with AI CineFocus
Define the focal point of a shot with AI CineFocus! Click to focus on a particular area of a scene and adjust aperture and focal range to change the depth of field. Advanced controls let you select the aperture shape and add optical effects like bokeh. You can even keyframe parameters to rack focus!
AI Face Age Transformer
Change an actor’s age with the AI Face Age Transformer tool. Analyze a face, enter the subject’s age and adjust the age offset slider to add or remove age-related features, such as wrinkles and facial fullness. Perfect for maintaining continuity in flashbacks and flash-forward scenes!
AI Face Reshaper
The AI Face Reshaper lets you change facial features’ shape and position on a moving subject. After detecting and tracking a face in a clip, use the AI Face Reshaper parameters to adjust the eyes, nose, mouth, eyebrows and overall face shape. Manual controls let you fine-tune the resulting face.
AI Blemish Removal
The AI Blemish Removal tool is perfect for reducing the appearance of superficial skin imperfections such as acne, discoloration, spots and pores while retaining texture of the natural skin. Use the strength slider to adjust the intensity of the tool to better suit the subject in the scene.
Sync with AI Slate ID
AI Slate ID automatically detects the slate clapperboard details! It intelligently extracts metadata from the slate in the frame, even in dark or out-of-focus clips, saving hours in metadata entry. Media is ready for editing, faster than ever before!
Extreme Quality AI UltraSharpen
DaVinci’s most advanced sharpening tool to date lets you produce significantly clearer, high quality moving images. Use AI UltraSharpen with upscaled videos to make previously unusable footage sharp in higher resolutions. AI UltraSharpen can also be used to improve or fix slight focus errors.
AI Motion Deblur
Remove common motion blur artifacts, such as streaks and softness, from video content. AI Motion Deblur analyzes the source media file and generates a new render with significantly reduced blurring for more dynamic images. This tool is perfect for more impactful slow motion and freeze frame effects.
Multi User Collaboration
DaVinci Resolve is the only solution that lets you grow and build your own multi user post production studio! The project libraries are built for real time local and remote collaboration. While the Blackmagic Cloud website lets you host and access your projects and media from anywhere in the world. Now you can collaborate with editors, colorists, visual effects artists, and sound engineers all working together at the same time. Best of all, you no longer have to import and export files, translate projects, lose work, or conform and manage changes. DaVinci Resolve is the only application in the world that lets everyone work together in parallel on the same project and at the same time!
Blackmagic Cloud Collaboration
DaVinci Resolve 21 supports the revolutionary Blackmagic Cloud, a whole new way of collaborating using cloud based workflows. Simply create a Blackmagic Cloud ID to log into the DaVinci Resolve Project Server and set up a project library for your project. You can assign any number of collaborators to a project, using Blackmagic Cloud to share projects. Multiple people can work on the same timeline! When changes are made, you can see and accept them in the viewer, changes are only applied when you accept updates. A single click can relink files, update timelines, or view changes. Built in timeline compare tools let you merge changes into a master timeline or others can continue with edits.
Blackmagic Cloud ID
Creating your Blackmagic Cloud ID is easy and there’s no charge! Simply click on the cloud icon in the DaVinci Resolve project manager to go to the Blackmagic Cloud website. Or you can go to the cloud icon on the Blackmagic Design website. Once you have your ID you can log in and set up your DaVinci library. This is where you create or upload projects to the cloud server. Simply select a server close to you and name your library. With your project library set up, create or import your project into Blackmagic Cloud and you are ready to start collaborating. Invite others with their Blackmagic Cloud ID to share the project and you can instantly have dozens of people all working on the project!
Blackmagic Cloud for Organizations
Larger companies can now use the Organizations app to define a single organization or company within Blackmagic Cloud. This lets you create groups or teams, so you can quickly share a project or a presentation to an entire group rather than sharing with each member one by one. You can easily add large groups to projects. Organizations also supports single sign on so that access for your staff and even freelancers can simply be authorized by your own IT team. You can also purchase Blackmagic Cloud storage and even a dedicated server for your project libraries. All of your project members, billing, project servers, licenses, cloud storage and presentations are shown in a single page.
DaVinci Resolve Studio Rental Licenses
If you are a larger company, managing single licenses or dongles can be challenging. Assigning license keys to a single user means they can continue using it even after the project is completed, and dongles require management. Plus it’s difficult to assign a single license cost to a specific project. Organizations solves this problem as it lets companies buy or rent DaVinci Resolve Studio. This makes it easier to allocate and remove licenses within large groups, as well as cost them against projects. You can assign 100 new licenses in seconds! Simply enter a Blackmagic Cloud ID and the software will just work. The rental license compliments the paid license giving you freedom of choice.
Get Blackmagic Cloud for Global Media Sync!
Why pay for expensive subscription cloud storage with monthly charges for unused space, or dedicated share SANs with bandwidth limited VPNs? Sharing your media with other collaborators can also be done with media sharing tools such as Blackmagic Cloud. You can select to sync media between computers, so everyone has a local copy of the project and can work fast. Everyone working on the project will automatically see changes made by others. As new files are added they will automatically sync and appear in the project. You can use your local drive, or if you have multiple projects and need more space you can use network storage drives such as a Blackmagic Cloud Store.
Blackmagic Proxy Generator
Camera original media is growing larger as sensor resolutions increase. So a new workflow is needed. The Blackmagic Proxy Generator, free with DaVinci Resolve, automatically creates proxies from camera originals. Simply select a size and type for your proxy, H.264, H.265 or ProRes and then select a folder or multiple folders as watch folders. Any original media placed there, even within a file tree, has proxies generated and placed in sub folders. These proxies are automatically linked by DaVinci Resolve to the original media. The proxy folder will also include audio files, image files, anything but camera originals.
Live Camera Sync to Blackmagic Cloud
Multiple Blackmagic cameras now support creating a small H.264 proxy file in addition to camera original media when recording. The small proxy file can upload to Blackmagic Cloud in seconds so your media is available back at the studio in real time for editors to start work. The ability to transfer media directly into the DaVinci Resolve media bin as editors are working is revolutionary and has never before been possible! Editors working anywhere in the world will get the shots! For multi-camera shoots, the new multi source feature in DaVinci Resolve's cut page will show each camera angle in a multiview. Blackmagic Cloud direct camera sync is a revolution in global post production workflows!
Use Your Own Storage
DaVinci Resolve is the only complete post solution that lets you use the storage of your choice. You don’t need to buy expensive, proprietary storage or hire an entire IT department to use or manage it! DaVinci Resolve gives you the flexibility to use cloud storage using Blackmagic Cloud ID, or you can use network storage such as a Blackmagic Cloud Store. Blackmagic Cloud Store models are very fast, high capacity network disks that are designed to handle large media files used on Hollywood feature films. The design uses advanced flash memory so easily handles lots of simultaneous users. Or turn any USB-C disk into network storage using the Blackmagic Cloud Pod!
On Set Cloud Workflows
On set to cloud workflows have traditionally locked users into a restrictive subscription and expensive cloud storage. Blackmagic Cloud puts you in control of your workflow and is charged based on monthly usage. While on set, camera originals are copied to your local Blackmagic Cloud Store where you can sync sound and create a timeline. The Blackmagic Proxy Generator is watching for these new clips and auto generates proxies. While these are synced via Blackmagic Cloud you can color grade the clips and publish the timeline. All collaborators can open your timeline using their Blackmagic ID and the synced proxy media to see your grades live while providing feedback with the built in chat.
Blackmagic Cloud Presentations
Presentations is a new feature that is also accessible using your Blackmagic Cloud ID. You get feedback on your work in progress without the complications of VPNs or the security risk of shipping files. Publish a timeline or clip directly from DaVinci Resolve into Presentations, or manually upload and then authorize a list of Blackmagic IDs that can have access to review. Presentations that have been uploaded can be reviewed at any time, even within a video conference or chat window. Shared markers and comments are automatically and bidirectionally relinked with DaVinci Resolve. Now it's easier than ever to gather frame accurate and collaborative feedback.
Private Project Server App
When security is paramount and you need to use VPNs and firewalls to meet accreditation regulations, or you’re setting up a collaborative workgroup within a private network, the DaVinci Resolve Project Server application gives you full control. The major update in version 18 offered a significant speed increase when opening and saving projects, and for sharing them across a private network. Share projects with editors, colorists, VFX artists, audio engineers on and off site to allow artists to continue to work remotely from home or while traveling on another job. DaVinci Resolve Project Server is free so you can share the same project or timeline with people simultaneously around the world.
Bin and Timeline Locking
Automatic bin and timeline locking let multiple people work without overwriting each others work. One user can create bins for organizing footage, add metadata and create string outs while another works in a different bin. Bins and timelines are "read only" until unlocked by the current user.
Secure Built In Chat
DaVinci Resolve features built in chat so team members can talk about shots, review tasks and share creative ideas without leaving the software. Editors can quickly message assistants, audio engineers, colorists and VFX artists to talk about work, producers can get status updates and more.
Visual Timeline Comparison
The revolutionary timeline comparison tool lets you visually see the differences between two versions of a timeline. You’ll be able to see exactly where footage has been added, deleted, moved or trimmed. This makes it super fast and easy to see, review and accept new changes as they are made!
Shared Markers
DaVinci Resolve lets you create private or shared markers. Personal markers are private and can only be seen by you, while shared markers can be seen by other people working in the project. This makes it easy for you to annotate clips, write notes and share ideas between other users.
Individual Monitoring and Caching
Each user in a collaborative project can generate and manage their own cache files and set their own monitoring preferences to optimize the performance of their specific system. You can also open collaborative projects in read only mode to review cuts or copy items without affecting other users.
Matching Grades Between Colorists
While the editors are creating the timeline and adding effects, the colorists and their assistants can select any clip and start grading simultaneously! Individual clips are auto locked while they are being graded so they can’t be overwritten, and each colorist knows who is grading which shot.
Live Save Changes Automatically
DaVinci Resolve features live save, which allows multiple users to constantly save small and incremental changes to the project’s database while working in real time. This means no-one loses the work they’ve completed since the last back up if they are interrupted or forget to save as they go!
All In One Solution for Post Production
DaVinci Resolve is divided into "pages", each of which gives you a dedicated workspace and tools for a specific task. Editing is done on the cut and edit pages, visual effects and motion graphics on the Fusion page, color correction on the color page, audio on the Fairlight page, and media organization and output on the media and deliver pages. All it takes is a single click to switch between tasks!
Photo
Hollywood's most advanced color tools for still photos
The Photo page introduces Hollywood's most advanced color tools to still photography for the first time. Whether you're a professional colorist applying your existing skills to fashion shoots and weddings, or a photographer ready to push the boundaries of dedicated photo apps, DaVinci Resolve unlocks the tools you need. Work with native RAW files from Canon, Fujifilm, Nikon and Sony cameras, reframing and cropping at source resolution. Manage and organize media with Albums and apply the full DaVinci color toolset to your images. Tether a camera for live capture and collaborate via Blackmagic Cloud. With all of DaVinci’s AI toolset, ResolveFX and FusionFX, the only limit is your imagination!
DaVinci Color Tools for Still Images
Colorists who have spent years mastering the high-end color tools in DaVinci Resolve can now apply those skills to still images! Controls include primary color correction, curves, qualifiers and Power Windows. You can build complex grades in a node-based workflow that goes far beyond the layer-based approach of conventional photo applications. You can even use professional scopes for photography, including parade, waveform, vectorscope and histogram. There is a wide range of Resolve FX and AI tools to add cinematic effects and isolate subjects, objects or backgrounds with a click. Plus, DaVinci Resolve color panels provide hands-on creative control that's faster than a mouse and keyboard!
Familiar Photography Tools and Formats
For photographers, the Photo page offers a familiar set of tools alongside DaVinci’s powerful color grading capabilities. It includes native RAW support for Canon, Fujifilm, Nikon, Sony and even iPhone ProRAW. All image processing takes place at source resolution up to 32K, or over 400 megapixels, so you're never limited to project resolution. Familiar basic adjustments including white balance, exposure, color and saturation give you a comfortable starting point. With non-destructive processing you can reframe, crop and re-interpret your original sensor data at any time. And with GPU acceleration, entire albums can be processed dramatically faster than conventional photo applications!
Non-Destructive Transform and Cropping
The Photo page Inspector gives you precise control over the transform and cropping parameters of your images. Reframe and crop non-destructively at the original source resolution and aspect ratio, so you’re never restricted to a fixed timeline size! Zoom, position, rotate and flip images with full transform controls and use the cropping parameters to trim the edges of any image with precision. Reframe a shot to improve composition, adjust for a specific ratio for print or social media use, or simply remove unwanted elements from the edges of a frame. All adjustments can be refined or reset at any time without ever affecting the original source file!
Collaborate Anywhere
DaVinci Resolve is the world's only post production software that lets everyone work together on the same project at the same time! Built on a powerful cloud based workflow, you can share albums, all associated metadata and tags, as well as grades and effects with colorists, photographers and retouchers anywhere in the world. Blackmagic Cloud syncing keeps every collaborator with the latest version of your image library in real time, and remote reviewers can approve grades offsite without needing to be in the same room. Hollywood colorists can even grade live fashion shoots remotely, all while the photographer is still on set!
Image Management
The Photo page gives you everything you need to manage your entire image library from import to completion. You can import photos directly, from your Apple Photos library or Lightroom, and organize them with tags, ratings, favorites and keywords for fast, flexible management of even the largest libraries. It supports all standard RAW files and image types. AI IntelliSearch lets you instantly search across your entire project to find exactly what you’re looking for, from objects to people to animals! Albums allow you to build and manage collections for any project and with a single click you can switch between your photo library and your color grading workflow!
Albums
Albums are a powerful way to build and manage photo collections directly in DaVinci Resolve. You can add images manually to each album or organize by date, camera, star rating, EXIF data and more. Powerful filter and sort tools give you total control over how your collection is arranged. The thumbnail view displays each image’s graded version alongside its file name and source clip format so you can see your grades at a glance. Create multiple grade versions of any image, all referencing the original source file, so you can explore different looks without ever duplicating a file. Plus, grades applied to one photo can be instantly copied across others in the album for a fast, consistent look!
Camera Tethering for Live Capture
Connect Sony or Canon cameras directly to DaVinci Resolve for tethered shooting with full live view! Adjust camera settings including ISO, exposure and white balance without leaving the page and save image capture presets to establish a consistent look before you shoot. Images can be captured directly into an album, with albums created automatically during capture so your library is perfectly organized from the moment you start shooting. Grade images as they arrive using DaVinci Resolve’s extensive color toolset and use a hardware panel for hands-on creative control in a collaborative shoot. That means you can capture, grade and organize an entire shoot without leaving DaVinci Resolve!
Powerful AI and Resolve FX Tools for Photos
The Photo page gives you access to over 100 GPU and CPU accelerated Resolve FX and specialty AI tools for still image work. They're organized by category in the Open FX library and cover everything from color effects, blurs and glows to image repair, skin refinement and cinematic lighting tools. These are the same tools used by Hollywood colorists and VFX artists on the world's biggest productions, now available for still images. To add an effect, drag it to any node. Whether you're making subtle beauty refinements for a fashion shoot or applying dramatic film looks and atmospheric lighting effects emulating the looks of a Hollywood feature, the Photo page has the tools you need!
Magic Mask and Depth Map
Magic Mask makes precise selections of subjects or backgrounds, while Depth Map generates a 3D map of your scene to separate foreground and background without manual masking. Use together to grade different depths of an image independently for results that have never before been possible for stills!
Relight FX and Lighting Effects
Add a realistic light source to any photo after capture with Relight FX. Relight analyzes the surfaces of faces and objects to reflect light naturally across the image. Combine with Magic Mask to light a subject independently from the background, turning flat portraits into stunning fashion images!
Face Refinement and Beauty Tools
Face refinement automatically masks different parts of a face, saving countless hours of manual work. Sharpen eyes, remove dark circles, smooth skin, and color lips. Ultra Beauty separates skin texture from color for natural, high end results, while AI Blemish Removal handles fast skin repair!
Film Look Creator
The Film Look Creator lets you add cinematic looks that replicate film properties like halation, bloom, grain and vignetting. Adjust exposure in stops and use subtractive saturation, richness and split tone controls to achieve looks usually found on the big screen, now for your still images!
AI SuperScale
AI SuperScale uses the DaVinci AI Neural Engine to upscale low resolution images with exceptional quality. The enhanced mode is specifically designed to remove compression artifacts, making it the perfect tool for rescaling low quality photos or frame grabs up to 4x their original resolution!
UltraNR Noise Reduction
UltraNR is a DaVinci AI Neural Engine driven denoise mode in the Color page’s spatial noise reduction palette. Use it to dramatically reduce digital noise from an image while maintaining image clarity. Use with spatial noise reduction to smooth out digital grain or scanner noise while keeping fine hair and eye edges sharp.
Patch Replacer
Sample an area of a scene to quickly cover up unwanted elements, like objects or even blemishes on a face. The patch replacer has a fantastic auto grading feature that will seamlessly blend the covered area with the surrounding color data. Perfect for removing sensor dust.
Quick Export
The Quick Export option makes it fast and easy to deliver finished images in a wide range of common formats including JPEG, PNG, HEIF and TIFF. Export either an entire album or just selected photos providing flexibility to meet your specific delivery needs. You can set the resolution, bit depth, quality and compression to ensure your images are optimized for their intended use. Whether you're exporting standalone images for print, sharing on social media platforms or delivering graded files to a client, Quick Export has you covered. All exports preserve your original photo EXIF metadata, so camera settings, location data and other important information always travels with your files.
GPU Acceleration
The Photo page uses GPU accelerated processing to deliver fast, accurate results across your entire workflow. Process hundreds of RAW files in seconds with GPU accelerated decoding and apply Resolve FX to your images in real time. GPU acceleration also means batch exports and conversions are dramatically faster than conventional photo applications. On Mac, DaVinci Resolve is optimized for Metal and Apple Silicon, taking full advantage of the latest hardware. On Windows and Linux, you get CUDA support for NVIDIA GPUs, while the Windows version also features full OpenCL support for AMD, Intel and Qualcomm GPUs. All this ensures you get high performance results on any system!
Hardware Panels for Rapid Edits
Hollywood colorists have always relied on hardware panels to work faster and more creatively and now photographers can too! The DaVinci Resolve Micro Color Panel is the perfect companion for photo grading as it is compact enough to sit next to a laptop and portable enough to take on location for shoots. It features three high quality trackballs for lift, gamma and gain adjustments, 12 primary correction knobs for contrast, saturation, hue, temperature and more. It even has a built in rechargeable battery! DaVinci Resolve color panels let you adjust multiple parameters at once, so you can create looks that are simply impossible with a mouse and keyboard.
Edit
The world's fastest and most advanced professional NLE
The edit page is the world’s most advanced professional non-linear editor. The familiar track layout, dual monitor design and traditional workflow makes it easy for new users to learn while still being powerful enough for professional editors. It’s perfect for larger projects such as feature films, television shows, streaming, commercials, documentaries and more. The edit page features drag and drop editing, context sensitive automatic trimming tools, fully customizable keyboard shortcuts so you can work faster, and a library full of hundreds of titles, transitions, and effects that you can add and animate. You also get complete media management, organization and timeline management tools.
Quickly Import Video
Getting files into DaVinci Resolve is as easy as dragging and dropping! The media pool at the top left of the screen contains all the clips in your project. To get started, simply find files you want to import on your hard drive, drag them into the media pool and start editing. You can even drag entire folders with subfolders into the media pool and maintain their structure. DaVinci Resolve is designed to work with virtually all professional video and audio file formats ranging from H.264 and H.265 to ProRes, Blackmagic RAW, EXR and more. Whether you’re shooting on an iPhone or using a high end digital film camera, you’ll never have to waste time copying, transcoding or moving files.
Mark Clips
Marking clips using "in" and "out" points lets you refine the portion of the clip you want to use in the edit. Double click a clip to load it into the source viewer on the left. Drag the playhead to the frame you want, then click the in and out buttons at the bottom right corner of the viewer to mark the start and end points of the clip. You can also use the I and O keyboard shortcuts for a faster workflow. Audio and video can be marked separately to create split edits where the audio starts before or after the video. Turning on audio waveforms lets you visually see where sentences start and stop, and you get tape style audio scrubbing so it’s easier to find the part of the clip you want.
Edit Clips Into the Timeline
You can drag and drop clips directly into the timeline or the timeline viewer on the right, where you will see an overlay with editing options. The edit overlay gives you instant access to the most popular types of edits, letting you quickly choose between insert, overwrite, replace, fit to fill, place on top, append at end, and ripple overwrite without having to remember shortcut commands. Once you’re familiar with the different types of edits, you can use the buttons for the most common edit types on the toolbar or use keyboard shortcuts to work even faster. After you’ve placed a few clips on the timeline, you can rearrange them using the swap and shuffle commands.
Insert
Inserts a clip into the timeline at the location of the playhead and pushes everything else down to make room for it. If the playhead is in the middle of a clip, it will split the clip and place the new clip in the middle.
Overwrite
The overwrite edit is one of the most common types of edits. When you perform an overwrite, it will place a new clip on the timeline at the location of the playhead, writing over whatever clip or clips were there before.
Replace
Replaces a single clip on the timeline with one of the exact same length. The "out" point of the clip you are editing into the timeline will be changed so it fits perfectly, making it the same duration as the one it replaces.
Fit to Fill
Fit to fill takes the portion of the clip that you have marked and adds a speed change to speed it up or slow it down. The speed change is automatically calculated so it fits into the space you have selected on the timeline.
Place on Top
The place on top command puts the clip you’re adding to the timeline on the next available video track at the location of the playhead. Place on top is great for adding titles, graphics or creating picture in picture effects.
Append at End
Append at end places the source clip after the last edit on your timeline, regardless of where the playhead is located. You can also use it to add multiple clips from the media pool to the end of your timeline all at once!
Ripple Overwrite
Ripple overwrite replaces a shot of one length with a shot of a different length. Longer clips replace the clip in the timeline and push everything down to make room, while shorter clips pull things in so there are no gaps.
Automatically Trim and Tighten
Trimming lets you adjust the timing between clips so you can fine tune your edit. The smart trim tool automatically switches between ripple, roll, slip and slide based on the location of the mouse pointer. This makes DaVinci Resolve faster because you don’t have to waste time going back and forth to switch trimming tools. Select the trim icon in the toolbar, then click anywhere inside a clip or at the edge of a clip on the timeline. You’ll see the cursor change to different types of trim tools as you move your mouse. This is known as context sensitive trimming. You can trim during live playback, hear audio while trimming and even trim multiple points on different tracks at the same time!
Roll
A roll trim works on both the left and right sides of an edit at the same time. While one side is shortened, the other side is extended by the same number of frames so the overall length of your timeline remains the same.
Ripple
Rippling will extend or shorten the beginning or end of a clip. When you ripple an edit point, everything to the right of the edit is pushed down the timeline or pulled in to accommodate the clip’s new duration.
Slip
Slipping changes the portion of a clip that you see in the timeline by moving its "in" and "out" points. The white outline shows the full source clip duration, so you can fine tune it without affecting the surrounding edit.
Slide
Sliding changes a clip’s position on the timeline without changing its length. The clips on the left and right get shorter or longer as you slide the clip in the middle. You can think of a slide like a roll between 3 clips.
Transitions and Effects Library
The effects library has extensive broadcast quality transitions and special effects plug-ins. Simply click the effects library icon at the top left of the page to open it, select the effect you want and drag it onto a clip in the timeline or onto the cut point between clips when adding transitions. Transition duration can be changed by dragging the edges of the transition in the timeline or by changing it in the inspector at the top right. The effects library features over 100 different transitions such as wipes and dissolves, along with over 80 GPU and CPU accelerated effects, including blurs, flares, warps and more! Plus you can add 3rd party OpenFX plug‑ins for even more creative options!
Incredible 2D and 3D Titles
To create 2D or 3D titles, open the effects library at the top left of the screen, find the text generator or Fusion title template you want, and drag it into the timeline above your video tracks. Then use the inspector to type your text and adjust parameters such as font, size, color and more. The basic title generators let you build simple titles and lower thirds from scratch. The subtitle generator can be used to create perfectly timed subtitles. There are also more than 100 Fusion title tools, which are professionally designed, pre-built 2D and 3D animated titles that you can customize to create professional looking cinematic titles without having to be a motion graphics expert!
Animate Any Clip or Effect Setting
Clip settings can be viewed in the inspector at the top right of the screen. You can change or animate any setting over the clip’s duration using the diamond keyframe buttons. Simply select a clip to see its parameters, adjust a setting, click the keyframe button, move the playhead to a different frame and repeat the process! You can also use the on screen controls to animate common transform parameters such as position, size and rotation. For even more control, click on the small keyframe and curve icons on the animated clips in the timeline to open the keyframe and curve editors. These allow you to move keyframes, adjust timing and set animation ease controls for virtually all parameters.
Createa Final Audio Mix
The edit page features a complete set of professional Fairlight audio controls and plug-ins. You can set levels of an audio clip in the timeline by clicking on the level bar in the middle of the clip. The inspector features a level slider too, along with controls for panning, pitch and a full 6 band parametric equalizer. To change the level on an entire track, simply adjust the track’s fader in the mixer. The mixer has visual meters that let you monitor signal levels, ensuring the audio is not too quiet or loud. There are also over 25 Fairlight FX in the effects library that you can use to clean up dialog, remove hum and more. Plus you can switch to the Fairlight page at any time for even more options!
Deliver for Web, Broadcast or Cinema
The Quick Export option is the fastest way to deliver a file. To output your program, go to the file menu and select Quick Export for one click access to the most popular delivery options. If you enter your account information, quick export will render and upload the finished video to your YouTube, Vimeo or Dropbox accounts, all in a single step! You can also create your own custom presets that will show up in the quick export window. Simply switch to the Deliver page, adjust your settings, and save it as a new preset! DaVinci Resolve can deliver files in a wide range of formats for the web, television broadcast, online streaming and even digital cinema packages for theatrical distribution.
Fine Tune Your Edit with Advanced Creative Tools!
Once you have mastered the basics, the edit page offers an incredibly rich set of features that give you total creative control over every aspect of your work! You will be able to create a polished final audio mix, add speed ramps, work with advanced editing and trimming tools for more sophisticated projects, transcribe clips for subtitles or text based editing, use facial recognition to organize clips, create picture in picture effects, work with multi-cam footage, and much more! Plus, DaVinci Resolve works with just about every type of video and audio file, and gives you a variety of different ways to manage your footage, which is especially useful when you are working on larger projects.
Cut
Designed for editors to turn around work fast!
The cut page is perfect for projects with tight deadlines that you have to turn around quickly. The streamlined interface is fast to learn and designed for speed. Features such as source tape, dual timelines, fast review, and smart editing tools help you work faster than ever. The sync bin and source overwrite tools let you quickly edit multicam programs. It’s also great for documentaries plus live broadcast editing and replay. Multi Source is the fastest way to see your cameras and edit to the timeline while the cameras are still recording! Everything on the cut page is action based so every click does something. That means you’ll spend more time editing and less time hunting for commands.
Designed for Speed
With a second page for editing, DaVinci Resolve is free to introduce new innovations to edit faster than using traditional edit software. The cut page can sometimes confuse experienced editors as it's a little different! However you can simply switch between cut and edit pages to use any combination of edit tools! In the cut page everything is live with only a single click to complete each task. The source tape lets you visually scroll all your clips at once to eliminate wasting time with media management. The sync bin allows non real time multi-cam so you can edit in higher resolutions! The cut page even supports small monitors! This means you spend more time shooting and less time editing!
Hardware and Software Combined!
Traditional edit software might look familiar, however it hasn't changed much in 30 years! Traditional software is designed for a computer mouse, so won't support hardware panels well. The dual timeline is perfect for a dedicated hardware controller and the search dial allows fast scrolling for editing and trimming. You see the whole timeline and edit point simultaneously! Plus there's no annoying horizontal and vertical scroll bars! The single viewer with source tape eliminates clicking thousands of clips to select shots. Even trimming is live and uses the search dial for amazing speed and accuracy. Plus all edits are intelligent, so most of the time you don't need in or out points!
Dual Timelines
Zooming in and out of edit timelines is very slow! The dual timeline means you never have to zoom again! The upper timeline shows you the entire program while the lower timeline shows you a zoomed in area of where you're working. This means the lower timeline is always zoomed to the perfect amount so the trim tools work perfectly. Both timelines are fully functional, allowing you to move and trim clips in whichever timeline is most convenient. Simply drag between timelines to move a clip anywhere in your edit. Only the dual timeline lets you see both your edit as well as the whole timeline at the same time!
Automatic Trim Tools
Trimming is incredibly fast because trim tools are selected automatically! Simply move the mouse around the edit point and each trim tool will be selected based on the mouse position. The mouse icon will change so you know what trim tool has been selected. When you start trimming, a trim editor will appear in the viewer so you can trim with greater accuracy. In the trim editor, the clips are laid out in a film strip with each frame visible, so frame accurate edits are simple and fast. That means there are 3 places you can trim, the upper timeline, the lower timeline and the trim editor! All edit modes are supported, including trim in and out, roll edit, transition duration, slip and slide.
Intelligent Editing
The cut page features the "smart indicator" that points to where edits will be performed, which also means most of the time you don't need to waste time placing in or out points on the timeline. This allows you to work faster as the smart indicator will move from edit to edit as you scroll the timeline. For example to insert a clip, simply select the portion you want in the viewer and then click the smart insert button on the toolbar. The clip is added at the nearest edit point and the timeline will ripple! Most edit modes work without in or out points so it’s faster to insert or append clips, create close‑ups, add synchronized cutaways from b‑roll and more.
Smart Insert
Inserts a clip at the edit point located nearest the playhead and pushes everything else down the timeline to make room for it. Select a new source clip from the media pool, set in and out points, then click the smart insert button on the toolbar!
Append at End
Append at end lets you add a clip or group of clips to the end of a timeline, regardless of the location of the playhead! Just choose the clips you want and then click the append at end button on the toolbar to add them to the end of your timeline.
Place On Top
Place on top adds a new clip to the next upper track in the timeline. When you select a clip in the media pool and use the place on top command, the new clip will be added above the current track on your timeline at current timeline scroll position.
Close Up
The close up command uses AI and machine learning in the DaVinci Neural Engine to automatically find faces in a shot and zoom into them. This lets you quickly cut in and add close up shots without having to manually zoom in and reframe the shot!
Ripple Overwrite
Ripple overwrite replaces a clip on the timeline with a new clip, even if the new clip is a different length. If the new clip is a different duration, the timeline will be rippled longer or shorter to make space for the new clip.
Source Overwrite
Source overwrite is the fastest way to make synchronized cut aways from different camera angles! Set an in and out point on the cutaway you want, then source overwrite will add the clip on the track above, perfectly synchronized to the layer below.
Source Tape
Finding a clip in a bin with thousands of files can be slow and frustrating! With source tape, you no longer have to waste time hunting through bins to find the clip you need. Simply click on the source tape button and all of the clips in your bin appear in the viewer as a single long "tape". This makes it easy to scroll through all of your media because you’re doing it visually! Simply scroll your media, find a shot you like, then edit it into the timeline! Plus it won't switch to the timeline after an edit, so you can keep scrolling the source tape and adding shots you like to the timeline. If you're working with unknown media then the fast preview lets you fast play the whole source tape.
Professional Trimming
DaVinci Resolve has a range of trim tools for fine tuning your edit to make it perfect. To trim in or out, simply drag to the left or right of the transition point and move the ends of the clips! Trimming the in or out point will also ripple the timeline duration automatically. If you want to slip a clip in the space it has in the timeline, then just click the slip icon located at each clip’s mid point. To roll and edit point, just click in the middle of the transition and slide it forward and back. You also get an A/B trimmer in the viewer once you start trimming. Plus when trimming, the clip audio will automatically zoom in so you can position your edit perfectly against dialog or music.
Roll
A rolling trim works on both the left and right sides of an edit at the same time. While one side of the edit is shortened, the other side will be extended by the same number of frames. That means the overall length of your timeline remains the same.
Trim
To trim in or trim out, simply drag on either side of the edit point, and the source or destination clips can be trimmed and you can see the effect on the edit instantly. Trimming the clips will automatically ripple the timeline duration.
Slip
Slipping changes the portion of a clip that you see in the timeline. The space for the clip stays the same, but the clip moves up and down. A white outline shows the full source clip duration, so you can see the clip’s handles as you adjust it.
Slide
Slide uses the same icon as slip, however you shift click. This allows you to move a clip up or down the timeline without affecting its duration. The clips on the left and right will get longer or shorter. It’s like a rolling edit with 3 clips!
Duration
If you need to adjust the duration of a transition such as a dissolve or wipe, then you can click the edge of the transition icon at the edit point. Now you can drag the duration length directly. A tool top will show a numerical duration time value.
Trimming with Audio
Clicking the new audio trim icon on the left side of the upper timeline will allow you to see a magnified view of the audio waveform while you are trimming. You can see waveforms and trim audio in the lower timeline and in the graphical A/B trimmer.
Viewer Trimming
The cut page features a large, graphical trimmer that lets you view and trim edit points with extreme accuracy. Also known as an A/B trimmer, this graphical view lets you see both clips in an edit at the same time. Double click any edit point to open the graphical trimmer in the viewer. The left clip is called the "A" clip and will be displayed on top, while the "B" clip on the right side is displayed below. You can see exactly where the trim point is and adjust each side with numeric frame counters and nudge tools. That means you can trim in 3 locations, the lower timeline, the upper timeline and the trim editor! When you’re done, click anywhere in the timeline to close the trim editor.
Sync Bin for Multicam Editing
The sync bin is the world’s fastest and most innovative way to select the perfect cutaway when doing multi camera shoots. Using the sync bin is easy and it’s much better than a traditional multi-cam feature. Just select the sync clips icon and DaVinci will find all clips that sync to the timeline and display them in a multiview. Simply scroll up and down the timeline and you will see all the clips that sync to the point in the timeline so you can pick the best cutaway. Then click the view with the mouse and then adjust the in and out points to select the cutaway you want. Now use the source overwrite edit mode to add this selected clip to the timeline, perfectly synced to the clip below!
Clip Inspector
The inspector allows you to change audio and video settings, plus it includes keyframe buttons that let you animate over time. There are tabs at the top for video, sizing, audio, effects, file metadata and transition controls. The video tab lets you set blend modes, stabilize shots, correct lens distortion and more. In the sizing tab, you can reposition, crop and scale images. The audio tab lets you adjust sound levels, pan, pitch and EQ. The effects tab displays all of the options for effects you’ve applied and the file tab lets you edit and view clip metadata, as well as access RAW image controls.
Transform, Color, Audio and Text
While the full inspector provides control over a wide range of settings and keyframe animation, the tool strip in the viewer is designed to give you faster access to more common settings and controls. It’s perfect when you need to make a quick adjustment! Click the tools icon at the bottom left of the viewer to display the consolidated tool strip under the image. You’ll see icons for transformation tools used to create picture in picture effects, cropping, audio level adjustments, speed changes, stabilization, lens correction, dynamic zoom and more. That means you’ll be able to quickly make basic adjustments without ever having to open the inspector or leave the cut page!
Transitions and Effects
Instantly access and apply over 100 transitions, effects and title templates! Because DaVinci Resolve is used on high end Hollywood films, the effects are true simulations of lenses and the way light behaves. Transitions include dissolves, iris effects, motion and shape transitions, wipes and more. Effects are organized into categories such as blurs, color, lighting, stylize, warping, texture, and more. Any effect or transition can be previewed by hovering the mouse over the effect title and moving the cursor left to right. That lets you preview an effect applied to your clip before you use it! To add an effect or transition, simply drag it to a clip and adjust its settings in the inspector!
Color
Hollywood’s favorite color corrector!
The DaVinci Resolve color page is Hollywood’s most advanced color corrector and has been used to color and finish more high end feature films and television shows than any other system! It’s also approachable with features designed to make it easier for new users to get great results while they continue to learn the advanced tools. For example, primary control sliders will be familiar to anyone who’s used image editing software, making it easy to adjust contrast, temperature, mid-tone detail, saturation and more. The color page has an incredible range of primary and secondary color grading features including PowerWindows™, qualifiers, tracking, advanced HDR grading tools and more!
Balance Image Color
Balancing color is the first step in the color correction process. This is done with the primary correction tools, which are located at the bottom left of the screen. Primary tools affect the entire image and you use them to adjust brightness and color levels to remove unwanted tints and to create a neutral starting point. Each wheel is mapped to a different part of the tonal range. You can simply click and drag inside a wheel to adjust that range’s color, then use the master dial below the wheel to change its overall level. This palette also has adjustment controls, primary bars and log controls. Once shots are balanced, you can begin the creative grading process to create unique "looks".
Primary Wheels
The primary color wheels let you adjust balance and brightness in overlapping tonal ranges called lift, gamma and gain (also known as shadows, midtones and highlights). The offset wheel adjusts the whole image.
Primary Adjustment Controls
The primary palette contains incredibly powerful primary adjustment controls that let you quickly adjust image contrast, saturation, hue, temperature, tint, midtone detail, color boost shadows, highlights and more. They’re an indispensable set of creative tools that you’ll use every day! For example, midtone detail lets you adjust contrast in areas with high edge detail to increase or decrease image definition or sharpness. Color boost, also referred to as vibrance, intelligently adjusts areas of an image with low saturation, resulting in a subtle and more natural looking increase of color. Whatever your grading experience, these tools will help you quickly produce amazing results!
Primary Bars
The primary bars are an alternative to the primary wheels that allow for more subtle changes to individual color channels and luminance. They’re great when you need to make minor adjustments to color and balance.
Log Grading
The log grading wheels have more tightly defined tonal ranges for shadows, midtones and highlights than the primary wheels. They’re designed for film style grading and let you adjust one tonal area without affecting others.
Auto Balancing and Matching
Balanced and matched shots make content from different cameras look consistent. You can use the auto balance tools to quickly balance a group of similar shots. Simply click the auto color button at the left of the color wheels palette to balance the shot’s color and contrast. You can also match the color between different shots. Select a clip, right click on another clip, and select "Shot Match to This Clip" from the menu. Resolve will match the color, contrast and brightness of the clip you’re working on with the one you’ve selected. If a shot contains a chip chart, click on the color match icon in the toolbar, select the type of chart used, line it up on the image and click match!
Adjust Contrast and Color with Curves
While the primary wheels give you broad control, curves let you sculpt the color and contrast of an image with much finer detail. Curves can be displayed by clicking on the first icon in the center palette. Each curve lets you adjust a customizable region of the image based on hue, luminance or saturation. The default "custom" curves let you adjust red, green, blue and luminance curves independently, while displaying a live histogram to help guide adjustments. There are also five curves that let you select one thing, such as hue, and change another aspect of it such as luminance or saturation. For example, Hue Vs Sat lets you select a hue and then change the saturation of that hue.
Custom Curves
Curves let you adjust luminance and color based on tonal areas you define. For example, you can create smooth cinematic contrast adjustments, boost the red in your highlights while lowering it in the shadows, and much more.
Hue Vs Hue
The Hue Vs Hue curve lets you change any hue to any other hue. It’s great for subtly altering elements that require minor adjustments. For example, a sky that appears a bit too cyan can be made into a richer shade of blue.
Hue Vs Sat
The Hue Vs Sat curve lets you alter the saturation of any hue within the image. This allows you to quickly boost the saturation of elements you want to catch the viewer’s eye, while reducing the saturation of those you don’t.
Hue Vs Lum
The Hue Vs Lum curve lets you alter the lightness of elements of a specific color. It’s ideal for darkening specific hues to add richness and depth, or for lightening colorful elements to which you want to draw attention.
Lum Vs Sat
The Lum Vs Sat curve increases or decreases saturation in different tonal areas of the image with a nice smooth falloff. For example, you can boost saturation in the midtones while reducing it in the shadows to add depth.
Sat Vs Sat
The Sat Vs Sat curve is used to adjust a specific range of saturation without affecting the rest of the image. Simply click in the viewer to choose a value and increase saturation to make it "pop" or decrease to tone it down.
Secondary Color Correction
Selecting a specific area for color correction is called "secondary grading." For example, you might want to change the color of a shirt without affecting the rest of the image. The qualifier palette lets you select and adjust part of an image based on hue, saturation or luminance. To start, click the eyedropper in the toolbar and then click and drag on the viewer to select the area you want. The selection is highlighted in the hue, saturation and luminance strips. Click the magic wand icon in the viewer to see the selection or "key". Use the controls in the qualifier palette to enhance the selection, then use the wheels, curves and other tools to adjust the image until it’s perfect!
Target Objects Using Power Windows
While qualifiers target an area of the image based on color, luminance, or saturation, Power Windows let you define a selection by drawing shapes around specific objects in a scene. When you click on the Power Window icon, the palette shows you different geometric shapes, along with a pen tool and a gradient tool. Click on the icon for the shape you want and it will appear in the viewer. Drag the on screen controls to adjust its size, soften the edges, and place it exactly where you want. There are also options for manually adjusting size, pan, rotation, softness and much more. Once it’s set, you can apply color corrections to the area inside or outside of the shape!
Track and Follow Objects
The tracker lets you automatically animate Power Windows to follow moving objects in a scene. To open the tracker palette, click on the cross hair icon in the toolbar. You’ll see a playhead, along with options for analyzing the pan, tilt, zoom, rotation, and 3D perspective of the shot. With your Power Window still selected, choose the options that best match the camera’s movement, move the playhead to the beginning of the clip, and click the track forward button. The clip is analyzed and the Power Window will be automatically animated to follow the object in your shot! The tracker can also be used to stabilize images or to attach effects, such as a lens flare, to specific objects in a scene.
Work with Nodes
Nodes are the building blocks of color correction in DaVinci Resolve. The first node is usually used for image balancing, while additional nodes are used for more creative work. For example, your first node may be a primary correction, the second might isolate and improve the sky, and a third node could smooth out skin tones. Nodes let you create unique looks without compromising image quality as you would grading with layers. The node editor at the top right is like a flow chart. The image starts at the left and is passed through each color correction or effect node until it reaches the output on the right. Nodes can be connected by dragging the output of one to the input of another.
Enhance Images with Resolve FX
The color page features a library of over 90 GPU and CPU accelerated Resolve FX plug-ins that you can use to enhance images and add effects. They’re organized by category in the Open FX library at the top right of the screen. There are a variety of blurs, color effects, glows and lens flares, vignettes, refinement and beauty tools, image restoration, sharpening, stylize, texture, transformation and warpers that you can add to any shot. To add an effect, drag it to any node. The library will switch to an inspector showing you the settings for that plug-in. You can adjust and keyframe different values similarly to the edit page! Third party Open FX plug-ins also show up in the library.
Professional Scopes
Color is displayed inconsistently on every screen, and even our eyes can interpret an image differently under various lighting conditions. Professional scopes give you a consistent way to see image data. The scopes palette, located at the bottom right of the screen, features five different scopes that give you objective tools for measuring and evaluating color in an image. They can be used to check tonal ranges, adjust skin tones, balance footage and match clips to one another. Scopes let you see the relative strength and range of color components such as luminance, chrominance, saturation, hue, color gamut, white point, individual RGB channels and more.
Parade
The parade scope helps you quickly see if one color channel is stronger than the others. It can be set to display multiple waveforms for a variety of video signals in an image such as RGB, YRGB and Y Cb Cr, making it easy to spot and fix imbalances.
Waveform Monitor
Similar to the parade, the waveform displays the luminance and color values overlaid on top of each other at the current frame. When the colors line up, they appear white, which indicates that each channel has an equal intensity.
Vectorscope
The vectorscope monitor displays a circular graph of your image data that represents its hue and saturation levels. It is commonly used to check if skin tones are shifted toward unflattering colors such as green, yellow or magenta.
Histogram
This histogram provides a graphical representation of each channel’s tonal distribution. This lets you evaluate tone, understand whether detail has been blown out in the highlights or crushed in the shadows, and to adjust brightness and contrast.
CIE Chromaticity
The chromaticity scope helps determine if colors are within the boundaries of your project’s delivery format as specified in project preferences. For example, when working in HD, colors falling outside of the Rec. 709 HD colorspace triangle will be clipped on HDTVs.
Save, Copy and Re-use Grades
The color page "gallery" lets you organize, share and re‑use grades in several ways to help speed up your workflow. The fastest way to copy a grade is to simply middle click a clip in the film strip to copy its grade to the current shot in the viewer. You can also save grades by right clicking anywhere in the viewer and creating a "still." Stills can be organized into albums and are stored in the gallery, which is located at the top left of the screen. The "Apply Grade" command lets you copy a saved grade to another shot. If you have a series of shots from the same camera, you can select them, right click and create a group. Now, when you grade one of the shots they’ll all be graded!
Compare Shots
Using wipe and split screen modes in the viewer is a great way to compare shots. You can compare a string of clips in a scene to each other, to variants of grades in the gallery or to versions of grades within a single clip. Clicking on “image wipe” in the top left of the viewer lets you view frames from two different clips. There are options at the top right for displaying wipes horizontally, vertically, mixed, as an alpha, as a difference matte, and even as a picture in picture. When you click on split screen, it lets you display multiple full frames in the viewer at once, based on a wide variety of criteria, which you can select from the drop down menu at the top right.
Find Mismatched Shots
The lightbox, which can be turned on by clicking its icon at the top right of the screen, displays every clip in your timeline as a thumbnail with grades applied. This is a great way to see how your shots look side by side and evaluate how the grade is affecting the story. It’s also a great tool for spotting differences between shots, or to simply see if there are any shots that you missed! Use the zoom slider to see a range of clips or the complete timeline. As the story progresses, you should see the color palette and the mood of the grade reflected in each scene. Any clip that "pops" out probably needs more attention. Just select a thumbnail and turn off the lightbox to jump to that clip’s grade!
Take Your Grading to the Next Level!
The color page has an extremely versatile and deep set of features designed to help you create great looking images. Whether you’re a video editor that’s new to color, an aspiring colorist, or a seasoned Hollywood colorist, you’ll find creative tools for expressing your vision, along with technical tools that help you work faster and deliver the highest possible quality images. You get a complete color management system and support for the latest HDR formats with tools specifically designed for high dynamic range work. In addition, you get powerful face retouching and beauty tools, paint for removing blemishes or unwanted objects, advanced noise reduction, film grain, restoration tools and more!
Next Generation HDR Grading
DaVinci Resolve Studio features the world’s most advanced tools for grading wide color gamut and high dynamic range (HDR) images. HDR grading is made possible thanks to 32-bit image processing, industry standard HDR output and Resolve color management. You get Dolby Vision, HDR10+ and new HDR Vivid metadata palettes, HDR mode node adjustments, HDR colorspace transforms supporting ST.2084 and HLG tone mapping, and HDR monitoring using built-in scopes. DaVinci Resolve includes a next generation HDR Primary Grading Palette with customizable zone based exposure and color controls, along with perceptually color-constant image processing, giving you total control over HDR grades.
HDR Color Wheels
Modern digital cinema cameras can capture 13 to 19 stops of dynamic range, which offers incredible potential for producing imagery that closely mimics human vision. However, extremely bright highlights or very dark shadows can be challenging to balance using traditional tools. The HDR palette allows you to address the different tonal ranges of the image, from shadows and highlights, to super blacks and specular whites. You can also create new color wheels and define your own custom tonal ranges in each image, enabling you to adjust tonality and colors based on the media’s unique requirements. The HDR grading palette gives you a level of creative control that has never been possible before!
Color Warper
The standard curve tools let you sculpt color and contrast in a variety of creative ways. The new color warper goes even further, allowing you to set a Hue vs. Hue color grade for specific saturations. This lets you give a completely new feel to images! It also allows you to warp color based on luminance, or brightness. When you click the color warper palette, you’ll see a web or grid display of all the hues and saturations in an image. Simply select any hue or range of hues on either the web or directly in the image viewer, then drag that range to another hue and saturation point on the web in the palette. It’s an entirely new, innovative way to transform color in your images!
Native RAW Image Editing
DaVinci Resolve works with virtually all native camera RAW formats. That means you can work with files directly from the camera’s sensor instead of compressed pixel data. Simply choose a RAW file and click the RAW icon located on the left side of the toolbar. The RAW palette gives you total control over highlight recovery, white balance, gamma, exposure, color temperature, tint, sharpness and more. RAW image processing is completely non-destructive and processes the clips before the node editor input. You’re simply re-interpreting the camera’s original sensor data. This allows you to change things, such as exposure, after the image has been shot, all without affecting image quality!
Refine and Retouch Faces
The face refinement tool in DaVinci Resolve Studio will find faces, automatically create masks for different parts of a face, and track them for you! That means you don’t have to manually isolate and track different parts of the the face. This saves you countless hours of work so you can focus on the creative aspects of refining and retouching faces. Simply drag the face refinement plug-in from the library onto a node and click analyze. Once it’s finished, use the sliders in the inspector window to sharpen and brighten the eyes, remove bags, lighten a brow, smooth out the cheeks or forehead, add blush, color lips and more! You can also use the beauty plug-in to gently smooth out skin if needed.
ResolveFX Ultra Beauty
ResolveFX Beauty features an ultra beauty mode that gives you advanced control when performing corrective beauty work. Developed with feedback from professional colorists, the tool features stronger filtering algorithms that produce more natural results. Simply drag and drop the beauty effect on a corrector node, and ultra beauty will activate as the default mode. You can easily address general imperfections with the smoothing parameter without affecting facial features, and then recover texture to produce a result that truly compliments the face. Perfect for scenes with harsh lighting that accentuate imperfections like corporate interviews, or even the bride and groom in wedding videos.
Remove Unwanted Objects
You can remove unwanted objects in a shot using a combination of Power Windows, tracking, and the object removal plug‑in found in DaVinci Resolve Studio. First, draw a window around the object you want to remove and track it. Next, add a new node and connect the alpha channel output from the tracked window into the new node. Finally, add the object removal plug‑in and click on the "scene analysis" button. The DaVinci Neural Engine analyzes the shot, using machine learning and AI to determine how to remove the object from the scene. You can adjust the search range, blend mode and clean plate settings until the object disappears!
Clone Part of an Image
The patch replacer lets you quickly paint parts of an image to clean it up. It’s like an image clone or rubber stamp tool that copies pixels from one location to another. It’s perfect for removing blemishes, painting out a piece of garbage, or hiding a small mark in an otherwise clean shot. Just drag the patch replacer from the plug‑in library onto a node. The two on screen controls show the area you're cloning and the part of the image it’s being applied to. Adjust position and size by dragging the on screen controls. Other settings such as the shape, softness and replacement detail, can be changed in the settings inspector. Add an FX tracker to attach it to a moving shot and you’re done!
Fusion
Cinematic quality visual effects and motion graphics!
The Fusion page lets you create cinematic visual effects and broadcast quality motion graphics right inside of DaVinci Resolve! Fusion features a node based workflow that makes it faster and easier to create sophisticated effects and animations than you could ever create using a layer based approach. You get hundreds of 2D and 3D tools for visual effects and motion graphics, along with advanced animation curve and keyframe editors that allow you to create incredibly organic and realistic animations. Fusion has everything from point, planar and 3D camera tracking to rotoscope and keying tools for creating photorealistic composites, stunning animated titles, 3D particle systems and more!
The Fastest Way to Create Effects
Whether you’re working solo or are a professional editor, colorist or finishing artist, Fusion lets you complete shots faster. That's because instead of sending out graphics, retouch jobs, or full blown visual effects shots to another system, all of the tools you need are built in. You can seamlessly move between the edit, Fusion and color pages with a single click. Fusion lets you quickly design lower thirds, animate 3D infographics or pull perfectly clean keys on a green screen shot. Multiple masks can be created, tracked and then passed to the color page, saving time and making intricate secondary color corrections such as realistic sky replacements, easier and better looking than ever.
Nodes Are Easier Than Layers
Fusion uses a flow chart called a node tree that visually maps out how effects are connected and work together. Nodes are like building blocks that represent effect tools, generators, transforms, masks and more. There are no confusing stacks of nested layers and hidden menus! You build effects by stringing nodes together one after the other. The MediaIn node represents the clip from the edit timeline. To add a blur, drag the blur node from the toolbar to your flow chart and connect it in sequence after the media in. Simply drag the output from the MediaIn node and connect it to the input of the blur node. Tools can be combined in any order, letting you create an unlimited number of effects!
The Fusion Workflow
There are five simple operations in the Fusion workflow that are the basis for all of your work. You merge images together, insert effects, use masks to isolate effects, adjust settings and fine tune your animations. You start by merging images together in either 2D or a true 3D workspace. Next, insert effects in between nodes. After that, you can create masks to limit effects to specific areas of the image, then adjust tool settings in the inspector. Lastly, you can fine-tune your animation by using the spline and keyframe editors. Once you’ve mastered these basics, you’ll be able to combine techniques to create virtually any type of visual effect or motion graphic animation that you want!
Merge Images
The merge node lets you layer, or composite images together. To do this, drag a merge node from the toolbar into the node tree. Use the yellow control to connect a background image and the green control to add a foreground. Media can be dragged in from your bins.
Insert Effects
Fusion includes over 200 filters and effects called "tools" in the effects library. To add a tool, drag it into the node tree at the bottom of the screen. You can insert an unlimited number of tools at different points in the node tree to create the desired effect.
Create Masks
Masks let you define the visible area of an effect on an image. For example, to blur out an unwanted logo, add one of the mask tools, draw a shape around the logo and connect it to the blue mask input of the blur node. You can even track the mask to follow the logo!
Adjust Settings
The inspector on the right displays all of the controls or properties for the currently selected tool. You can adjust settings and animate them over time using the keyframe buttons. The cut, edit, Fusion and Fairlight inspectors are similar and all work the same way.
Fine Tune Animations
You can access the spline (or curve) and keyframe editors by clicking on their buttons at the top of the Fusion page. These panels give you advanced controls for creating and manipulating custom animation curves, as well as for positioning keyframes across time.
Animate 2D and 3D Titles
Text can be designed in either 2D or 3D. For 2D text, drag a Text+ node into the node tree and type your text to get started. You’ll find advanced yet familiar text controls in the inspector for font, size, alignment, spacing, kerning, leading and more. Click on the shading tab to stylize text with gradient or video fills, outlines, drop shadows and glows. Adding a Text 3D node gives you similar formatting controls along with 3D extrusion, custom beveled edges and more. To add textures, surface properties and reflections, just connect a replace material node to the text 3D node. You’ll find controls in the inspector to animate entire blocks of text, lines, words or even individual characters!
Add and Track Infographics
The Fusion page allows you to quickly and precisely add and track infographics. First, connect a tracker to your clip, use the on screen controls to place the tracker over the part of the image to which you want to attach the graphic, then click track forward. After the track is complete, click on the operation tab and change the operation to "match move.” This turns the tracker into a merge node! Import your multi layered Photoshop files using the import menu or by dragging them in from the media pool. Connect the graphic to the green foreground input on the tracker node to complete the composite. Now, as you animate your graphics, they’ll move in sync with the tracked object in your scene.
Paint Out Unwanted Objects
The vector paint tool includes multiple brush types and stroke styles that can be edited and animated at any time. Paint can be used for creative and corrective purposes. For example, you can paint leaves swirling in the wind or clone out an unwanted boom mic hanging in a shot! To clone out an object, add the paint tool from the toolbar and connect it to a clip. The tools at the top of the viewer let you set the paint stroke to operate on a single frame or a range of frames. Select clone mode in the inspector, then option click in the viewer an area to sample. Then paint over another part of the image to clone it out! Paint strokes can also be set to follow tracked moving objects in the shot.
Replace Signs, Screens And Billboards
Fusion’s powerful planar tracker lets you add new screens to a smartphone, replace a sign on the side of a moving truck, add a new billboard to a shot and more. All you have to do is connect a clip to the planar tracker, draw a shape around the area you want to track and click the track forward button in the inspector. A tracking cloud will be created with a precise motion path that contains position, rotation, scaling, and perspective changes. The planar tracker node includes built in corner pinning, making it easy to connect the new screen or sign into the node and position the four corners. You can even use the tracker data to animate mask shapes, making rotoscoping tasks incredibly fast!
Remove Green and Blue Screens
Fusion's Delta Keyer quickly removes green and blue screen backgrounds so you can place actors into settings that are impossible to shoot. Setting up your key is simple. Start by dragging the Delta Keyer from the effects library onto the line between your green screen clip and the foreground input on the merge node. From the inspector, drag the eye dropper into the viewer to sample the color you want to remove. The pre-matte, matte, fringe and tuning tabs give you a complete set of controls to refine the key until it’s perfect! You can also add a clean plate node which makes it easier to remove the background from shots and is especially useful for clips with reflections, hair and smoke!
Add 3D Particle Effects
Particles can be used to create realistic atmospheric effects like fire, rain or smoke, or fantastic swirling glowing bits for use in motion graphics and broadcast design. You can create particle systems from any type of image. To create particles, you need to add both a particle emitter and a particle renderer to your node tree. Click the particle emitter and open the inspector to customize and start animating your particles. There are more than a dozen particle specific nodes that can be inserted between the emitter and renderer to simulate gravity, friction, turbulence, bounce and more. Best of all, particles work in 3D so you can make them flow around and bounce off other elements in the scene!
Track and Follow Any Object
Tracking plays a key role in creating sophisticated visual effects and motion graphics. Fusion makes tracking easy with advanced 3D camera tracking, powerful planar tracking and rock solid 2D tracking. The 2D tracker is great for following most objects that move throughout a scene. Planar tracking lets you track image planes, or flat objects, in a scene. It’s ideal for replacing signs or screens. The 3D camera tracker is extremely powerful because it analyzes the motion of the camera that shot the original scene and recreates it in 3D space. This lets you add objects such as text, 3D model set pieces, or even atmospheric particles such as fog or smoke that seamlessly blend into the scene.
Speed Up Your Workflow
Fusion is packed with time saving tricks to help you click less and move faster. Keyboard shortcuts like Shift+Spacebar enables a tool search window, type in the tool name and press enter to add the tool. Node versioning is perfect for trying out new animations without duplicating a node. Quickly switch between versions by clicking on the numbers located at the top of the inspector. The clip timeline gives you quick access to every clip in the timeline on the edit page, so you can work on new shots without having to leave the Fusion page. Lastly, quickly view any selected node in the right and left viewers by pressing the number 1 or 2 key, and clear all viewers by pressing the tilde key.
Advanced Visual Effects and Motion Graphics Tools
The Fusion page features hundreds of advanced feature rich tools for creating photorealistic visual effects, powerful broadcast graphics and sophisticated title animations. Unleash your imagination with an infinite 3D workspace, transport characters to new worlds with 3D set extensions, or build custom templates that can be used right from the edit and cut pages for efficient broadcast workflows. Best of all, Fusion’s powerful spline based keyframe editor and expressions let you create incredibly smooth and sophisticated animations. There's even built in scripting and automation. There really is no limit to what you can achieve with Fusion, and it’s right inside of DaVinci Resolve!
True 3D Workspace
Fusion features a true 3D workspace for compositing and creating cinematic visual effects and advanced broadcast motion graphics. It’s ideal for adding 3D models, objects, text or particles to your footage. To start, use the basic 3D nodes such as shape or text nodes, along with the 3D merge and camera nodes. There are a vast number of 3D tools to help you generate and manipulate surfaces, bend meshes and more. The 3D merge tool lets you add an unlimited number of objects, lights and cameras into your scene. 2D images can be used in 3D by placing them on 3D shapes such as image planes, spheres, or other objects and combining them with 3D text, lights and cameras to create dramatic designs.
Import and Render 3D Models
You can import 3D models or even entire 3D scenes from apps such as Maya and 3D Studio Max directly into your shots on the Fusion page. Using the FBX import menu, Fusion gives you the option to import FBX (Filmbox) scenes or Alembic animated geometry files, dramatically increasing your creative options for visual effects and motion graphics. For example, you can import a 3D model of a mobile phone and replace its screen, add a new car into a commercial spot, create a swarm of attacking spaceships, or add a dragon fighting live action knights in front of a castle! Then add textures, shading and lights, composite your actors into the shot and create photorealistic Hollywood style effects!
Realistic Lighting and Shading
Fusion’s sophisticated lighting tools let you add truly realistic lighting effects to your 3D scenes. You can add an unlimited number of customizable light sources such as ambient lights, directional spot lights and point lights. Directional spot lights can cast shadows. Color, angle, intensity, falloff and other lighting parameters can be adjusted and animated over time. You can even control how elements within a 3D scene react to lighting as well as define which objects cast shadows and reflections. To see the effects of your lights in the 3D viewers, click on the lighting button at the top of your viewer and don’t forget to enable lighting when you’re ready to render the final shot!
Spline Based Animation
The Spline Editor, which can be opened by clicking on its icon at the top right, gives you incredible control over curves that control the speed, or rate of change, in an animation. You can change the speed between keyframes using linear or fully customizable bezier and b-spline curves. The spline editor features a strip at the bottom with tools to reverse, loop or ping pong animations, making it faster and easier to create keyframe animations. You can even squish and stretch keyframes to shorten or lengthen animations without changing the relative motion! Curve shapes can be copied and pasted between parameters, independent of values, so you can create consistent, perfectly timed animations.
Fairlight
Professional tools designed for audio post production
The Fairlight page features hundreds of pro tools for audio post production. It’s like having a professional digital audio workstation (DAW) built into your editing and color system! The Fairlight Audio Core lets you work with up to 2,000 tracks at a time with realtime effects, EQ, and dynamics processing! You get sample accurate editing tools, advanced ADR and Foley, and Fairlight FX such as reverb, de-esser, and hum remover, plus AI effects like Voice Isolation and Music Remixer and more. IntelliTrack AI tracking lets you use video to track the Fairlight audio panner and you can mix and master stereo, 5.1, 7.1, and even immersive 3D audio formats including 5th order ambisonics!
Engineer Your Own Final Mixes
Whether you’re a video editor using Fairlight for the first time, a ProTools user moving to DaVinci Resolve, or a sound engineer used to working on a massive console, the Fairlight page has everything you need! Video editors will find familiar arrow and selection tools just like on the edit page, making it easy to start learning Fairlight. If you’re coming from another digital audio workstation, smart mouse based editing tools and customizable keyboard shortcuts let you edit sound faster than ever before. For even more speed and control, add the Fairlight Desktop Console or a customizable 2, 3, 4 and 5 bay studio console for larger film, television and commercial projects!
Smart Edit Tools
Fairlight’s focus mode provides a multi function edit selection toolset that’s designed for fast sound editing with a mouse and keyboard. It even works during live playback and recording so you can fix problems as you hear them! Focus mode lets you work faster by changing context based on where you click. It combines arrow and marquee tools to give you a new way of selecting edits. Click the lower half of a clip to select or move it, the upper half to set an edit point, or drag a range to select it. There are dozens of new sound editing commands that are customizable with keyboard shortcuts. The playhead snaps to the selection, so you can start playback without manually moving the playhead!
Clip Adjustments
Each clip in the timeline has its own volume, pan, pitch and 6-band parametric EQ controls. Fade handles located on the side of clips let you quickly add fade ins and fade outs. You can also adjust clip volume by raising and lowering the clip gain line in the middle of the clip. To change clip volume over time, hold down option on your keyboard and click to add keyframes, then drag to adjust the level. The waveform updates in real time. The clip inspector also features a level slider, panner, pitch adjustment and EQ settings. Levels can also be set using the normalization command, which can be found by right clicking on a clip. This lets you quickly set target levels for timeline clips.
Full Automation Control
Automation tools let you record changes to virtually any control setting or effect over time so they adjust automatically during playback. Click the automation icon in the tool bar to display the controls, choose your settings, and enable the parameters to automate. Track headers feature a drop down menu for showing different parameter curves in the timeline so you can edit automation graphically. The Fairlight menu has additional options for editing automation. Use the preview button in the toolbar to try out new automation without writing the data, then turn it off to commit the changes. You can also view main and bus tracks in the timeline and graphically edit their automation data too!
Waveform Editing
The Fairlight audio timeline combines clip and waveform editing in a single view, so you don't have to switch to a different window for sound editing. Like the edit page, you can use the selection arrow to rearrange clips, extend or shorten them, quickly add fades and adjust levels. For waveform editing, just zoom all the way in to see the individual audio samples! The closer in you zoom, the easier it is for you to spot clicks, pops or other problems. Once you have zoomed all the way in, the pointer becomes a pencil tool allowing you to redraw the waveform or draw a new one, and remove unwanted sounds! Changes to the waveform automatically update in real time when you zoom out.
Professional Mixer
The Fairlight audio page features a professional mixer with channel strips for timeline tracks and busses. All channel strips include a fader to adjust levels, stereo and 3D panners, 6 effects slots for adding plug-ins, along with dynamics and a 6 band parametric equalizer on every channel. Make volume changes on the fly while you mix, or record the changes over time with automation. Click the automation button in the toolbar, set the touch control to latch, and then choose the parameter you want to record from the "enable" button in the toolbar. Active faders turn red during playback while automation data is recorded and green when you have finished.
EQ and Dynamics Processing
Every track includes real time equalization and dynamics processing to fine tune your mix. This is in addition to 5 built-in track FX and 6 real time track effect inserts. Fairlight is more powerful than other digital audio workstation software! Double click in the EQ area above any channel strip in the mixer to open the 6 band parametric equalizer. There’s a graphic display and knobs for equalizing or filtering different tonal ranges. Double clicking the dynamics area will open the dynamics window featuring an expander/gate, compressor and limiter dynamics processing. Use the interactive controls to adjust your tracks, A/B auditions, save presets or copy settings from one track to another.
Clean Up and Repair Sound
The Fairlight page includes Fairlight FX plug-ins for clean up and repair sound. They are located in the effects library, click on the icon at the top left of the screen. You get FX such as the de-esser to minimize annoying "s" sounds, de-hummer to remove power line hum, noise reduction plugins and more. Simply drag one to a clip and its window opens for making adjustments, or drag to a Fairlight mixer channel to process whole tracks at once. The noise reduction plug-in automatically detects noise in a selection or you can teach it by selecting noise and clicking on "learn." Anything that matches the noise is removed! You can add as many plug-ins as you need to clips or up to six per track.
Automatic Ducking
Ducking allows the volume of a target track, such as music, to be lowered during dialogue and raised when it ends. The track FX ducker plug-in uses the signal from one or more dialogue tracks to automatically control volume reduction on a target track, responding according to how you set the controls. Simply open the ducker window on the music track and choose the dialogue track(s) source from the dropdown menu. Adjust the duck level, recovery or other controls to adjust the amount of volume reduction. You can also adjust how quickly the ducker returns the music level back, based on the volume of the dialogue. Now whenever there’s dialogue the music is automatically turned down!
Sound Effect Libraries
DaVinci Resolve makes it easy to access your external sound libraries right from the Fairlight audio page so you don’t have to leave the application! Click the sound library icon at the top left of the screen to open the search window, find a sound, mark the part that you want to use, and then click the audition button to try it out on your timeline. You can keep auditioning clips until you find the perfect sound. Once you have auditioned a clip in the timeline click the confirm button to keep it, or the cancel button to remove the clip and try another. There is even a sync button that lets you sync any part of the sound effect waveform to the playhead in your timeline.
Media and Delivery
Incredibly wide format support, finishing and mastering!
The media and delivery pages have everything you need to import, manage and deliver final projects. The media page is a dedicated full screen workspace that lets you prepare footage, sync clips, organize media into bins and add metadata before you start editing. Use the clone palette to ensure every bit of data in the camera media cards is copied during backup. During edit or grading, stream video outputs to a remote client monitor via DeckLink. You can output and upload files to YouTube, Vimeo and X from anywhere page using the quick export tool. The deliver page gives you total control over all encoding options and formats, along with a render queue for exporting multiple jobs!
Organize and Sync Footage
The media page is a dedicated workspace for importing, organizing, syncing footage and adding metadata. The top of the screen displays the hard drives connected to your system, while the bottom of the page displays footage in the current project. To import footage, drag it from the drives at the top into the project’s media pool at the bottom. The viewer lets you preview footage before adding it to your project and the metadata inspector can be used to view or edit metadata. You can make source side adjustments, such as adding a LUT before editing. The media page can also be used to clone and backup camera media, sync separately recorded audio and video, and even extract audio from clips!
Bins and Smart Bins
Bins are folders that you create in the media pool to organize footage. You can create bins just like you create folders on the hard drive, then drag footage into them as desired. Standard bins let you organize footage however you’d like. Smart Bins use metadata to automatically organize your clips and are always kept up to date as new footage is added to your project. Power Bins are visible across all projects on your system, making them perfect for re-usable assets such as graphics, logos, titles, clips and more. The DaVinci AI Neural Engine even lets you organize media based on people detected in your footage! Bin views can be customized and you can open as many bin windows as you need!
Sync Audio and Video
The media page includes tools for syncing audio recorded from separate sources with your video files. Just select the audio and video clips and use the sync command. You can sync based on timecode or by audio waveforms. In addition, you can manually sync audio and video by moving the playhead to a frame in the picture viewer, moving the playhead to a frame in the audio viewer and clicking on the link button. Best of all, you don’t have to render new media. Resolve manages it all for you, merging the audio, video and metadata from the files so you can start editing immediately! In addition to syncing on the media page, you can also now sync audio and video clips on the edit page timeline!
View and Edit Metadata
The media page includes an inspector to view and edit over 200 different metadata parameters for every clip! DaVinci Resolve works with both file and frame level metadata. Metadata is automatically imported, plus you can enter your own custom keywords and tags. Footage can be sorted into smart bins based on any criteria. There are pre-defined metadata groups you can view to quickly see camera information, production details, audio and more. You can also create your own unique sets of metadata to create custom metadata views. Metadata tags can even be used to change the display names for clips using scene, shot and take information. That means you’ll never have to rename media files again!
Clone and Backup Camera Media
Backing up camera media cards on set while you’re shooting is critically important. You need to make sure with 100% certainty that you have verified working backups before erasing and re-using camera cards. DaVinci Resolve is perfect for use on-set because the clone tool lets you quickly clone camera cards, mags and folders, complete with checksum verifications like XXHash64. This lets you create backups of mission critical camera media with confidence before erasing the media and recording over it. The clone tool makes bit for bit copies with checksum of media cards, SSDs and mags from cameras. For maximum protection, you can save multiple copies to different destinations at the same time!
Quick Export
The Quick Export option is the fastest way to deliver a still or clip. To output your program, go to the file menu and select Quick Export for one click access to the most popular delivery options. If you have entered your account information in DaVinci Resolve’s preferences, quick export will render and upload the finished video to your YouTube, Vimeo or TikTok accounts in a single step! There are also options for creating ProRes masters, exporting H.264 and H.265 files, or exporting audio only. You can also create your own customized presets that will show up in the quick export window. Simply switch to the deliver page, adjust your audio and video settings, and save it as a new preset!
Queue and Output Multiple Jobs
When you need to output multiple jobs at once or multiple versions of the same job, the deliver page lets you batch process or even offload rendering to another system! The render queue is where you line up projects to be output. You can quickly add multiple timelines or clips to the render queue for batch processing. Simply create each job, click the "Add to Render Queue" button and then start the batch. Jobs can be output as audio and video, audio only, or video only. If you’re working on a network with DaVinci Resolve Studio, you can offload the rendering of projects and jobs to another workstation. That means you can render on another system while continuing to work on your system!
| System Requirements | Mac: Mac OS X 10.10.3 Yosemite and 10.11 El Capitan 16 GB of system memory is recommended and 8 GB is the minimum supported Blackmagic Design Desktop Video version 10.4.1 or later CUDA Driver version 7.0.36 NVIDIA Driver version - as required by your GPU RED Rocket-X Driver 2.1.31.0 and Firmware 1.4.1.16 or later RED Rocket Driver 2.1.23.0 and Firmware 1.1.18.0 or later Windows: Windows 8.1 Pro 64 bit with SP1 16 GB of system memory is recommended and 8 GB is the minimum supported Blackmagic Design Desktop Video version 10.4.1 or later NVIDIA/AMD/Intel GPU Driver version - As required by your GPU RED Rocket-X Driver 2.1.31.0 and Firmware 1.4.1.16 or later RED Rocket Driver 2.1.23.0 and Firmware 1.1.18.0 or later |
- Novo
- Novo
- Novo
- Novo
- Novo

- Novo
- Novo
- Novo
- Novo
- Novo
- Novo
- Novo
- Novo
- Novo
- Novo
- Novo
- Novo